The simple (and not so simple) adventures in food and crafting

Monday, September 30, 2013

Denim Flowers

My mother (bless her) sent me a box full of craft supplies the other day. While pilfering through the beads and the fabric, I was very excited to find a pattern my grandmother had handed off to me last year. On a lazy afternoon last fall, granny had taught me how to make flowers out of scraps of felt and a needle and thread.
I decided to try and make another one, this time out of denim.

It didn't go as well as I'd hoped.


It just... It looks a bit... Well...

Sad.

OK, really sad.

I started by cutting thirteen ovals in three different sizes using the patterns I'd found in the box.

Next I pinched the end of each oval and stuck a needle with thread through the folds. I continued to pinch and stitch the biggest ovals together loosely.

The idea is to continue this process with the next layer of ovals, stitching them in the same way and arranging them on top to look like the petals of a flower.
This was about the time I realized that my pattern pieces were too big. I placed my denim flower next to my felt flower (see the first picture) and realized that they were very different sizes. Still, I didn't want my project to be totally incomplete. I added a red button that looked promising.

When I was asked what I was making (at the time, it was technically done), I decided that my denim ovals weren't quite convincing enough to be called a flower. Next time I'll be using felt... And smaller petals. Sorry granny, I never was very good with plants, was I?

On the upside, October is finally upon us. I can't wait to sip pumpkin-flavored coffee, watch scary movies and craft Halloween costumes! I am off to brainstorm for my next (hopefully more successful) Fall-themed project!


~Charlotte

Monday, September 23, 2013

Lucky Charms Cookies


So for this post I decided to try something that I didn't particularly have a recipe for. You see there's this really good cookie place by me that occasionally will have Lucky Charms Cookies (I'm obsessed). So I called in the other day to ask if they knew when the next time they'd have them would be and they said SAINT PATRICK'S DAY!!!!! There was no way I would be able to hold out until March for this cookie, so I decided to try and make them myself. And you know what?

THEY TURNED OUT AMAZING! Like I had to stop eating them because I was making myself sick.

So recalling the cookie I'd had before I was pretty sure it was a sugar cookie so I used my go-to sugar cookie recipe that I found in a Google search long ago, which you can find here.

So for this recipe you'll need: flour, sugar, butter, baking soda, baking powder, an egg, vanilla extract, and of course Lucky Charms cereal.


First you'll need to pre-heat your oven to 375 degrees.

So next you start out by mixing 2 3/4 cups of flour, 1 teaspoon of basking soda, and 1/2 teaspoon of baking powder in a small bowl


Next, cream one cup of softened butter and 1 1/2 cups of sugar in a mixer until smooth.


Then you beat in one egg and a teaspoon of vanilla.


Next, you slowly add in the flour mixture. I did about a cup at a time until it was all incorporated.


Your mixture should look something like this when you're done


Okay so now, you're going to get as much dough as you can off of the beater and take your mixing bowl off of the mixer. I hand mixed the Lucky Charms in because you don't want the cereal and marshmallows to get all crushed up in the batter, you want them to be whole and give your cookie a sweet crunch.

So I ended up adding about 2 cups of Lucky Charms, and it turned out to be the perfect amount for the cookies. Make sure you really get it all mixed in the dough so that each cookie has enough cereal and marshmallows.


So now you just make the dough into balls and place it on an ungreased cookie sheet. I tend to make my cookies big so I got twelve on a sheet.


Then you just pop them in the oven for about 10 - 15 minutes depending on how large you're cookies are. If you make big cookies like me, it'll be more towards the 15 minute mark, but watch them as it gets close.


I was really impressed and happy with the way these cookies came out! They were absolutely amazingly delicious!

Lucky Charms Cookies

2 3/4 cups flour
1 teaspoon baking soda
1/2 teaspoon baking powder
1 cup butter softened
1 1/2 cups sugar
1 egg
1 teaspoon vanilla extract
2 cups Luck Charms

Instructions

Pre-heat oven to 375

Mix together flour, baking soda, and baking powder in a small bowl, set aside

Combine butter and sugar in a mixer and beat until smooth

Add in egg and vanilla to butter mixture, mix until smooth

Slowly add in flour mixture until incorporated

Hand mix in Lucky Charms

Roll into balls and place on ungreesed cookie sheet

Bake 10-15 minutes

Makes about 24 cookies

Monday, September 16, 2013

The Hot Air Balloon

Several months ago, I stumbled across this fantastic tutorial for paper hot air balloons. I can only imagine the amount of skill and patience that went into designing them!


Picture from PaperMatrix

Not only is the video tutorial available on youtube, the pattern is available on PaperMatrix!
The video tutorial made the project look so simple, I was sure that I would be able to make one of these in no time at all.

I was wrong.

In retrospect, I should have known it would be tricky at first... I was never very good at origami, after all.

I started by cutting out the balloon pattern. I used some colored card paper that I had lying around.

I was a little overconfident when I started weaving the pieces together. Instead of the neat twelve-point pattern (shown on the top of the completed balloon) I ended up with something that resembled an injured octopus.

So, I revisited the video tutorial and tried again.
Much better! I kept weaving, but got stuck when the balloon started to take shape. I used paper clips, but I'm thinking about gluing as I go instead.

I've put this little project aside for now, but I am determined to finish it! I'm thinking about making a mobile with hot air balloons and paper clouds. Apparently my paper-folding skills need work, so it wouldn't hurt to make a few of these for practice. Next time I'll set aside more time for hot air balloon-making... I want them done right, after all!

Sunday, September 8, 2013

Baked Apples with Oatmeal Brown Sugar Topping


So I was feeling in the mood for something a little on the healthy side, but still a little indulgent today. Also as we start to get into fall I felt that this would be a perfect dessert to top off the evening. Also another great part of this recipe was that I already had everything on hand and didn't have to make a trip to the store because the list of ingredients is short and simple.

So this recipe calls for apples, flour, oatmeal, brown sugar, butter, cinnamon, ginger, and salt.


So first you need to start out by cutting the apples in half and then getting the core of the apple and the stem parts out. The original recipe said to use a melon baller, but I don't own one so I just used my handy dandy knife and worked out a pretty good method.

So first you need to slice the apple all the way down on each
side of the core just deep enough that you get all the core
but don't cut the apple completely

Then you cut across behind the core between
 the two slices in the apple
Then you just pull out the core
So the original recipe called for 3-4 apples, but I like to buy smaller apples because I like them for a small snack, so I ended up using about 6.


So next you're going to mix up everything else in a bowl. So I ended up doubling the original recipe for the oatmeal brown sugar topping because otherwise the apple were pretty scarcely filled and who doesn't love a yummy topping? So here are the amounts for the doubled version of the topping (which gave the perfect amount in my opinion). 

First it's a stick and two tablespoons of melted butter, and then half a cup each of oatmeal, flour, and brown sugar.


Next is a teaspoon of cinnamon, and a pinch each of salt and ginger. Now let me show you what I mean by pinch.

Pinch of salt
Pinch of Ginger
Then you mix all of that up until its all wet and clumpy (make sure you really get the brown sugar all mixed though and that there are no chunks of brown sugar just chilling in there).


Then you just line the apples up in a baking dish. I used a brownie pan because they fit pretty nicely into it and I didn't have to worry about them falling over in the oven and have the topping come off.


Then you just press liberal amounts of the topping into and covering the tops of the apples.

This was the point where I was realizing that
I needed to make more topping
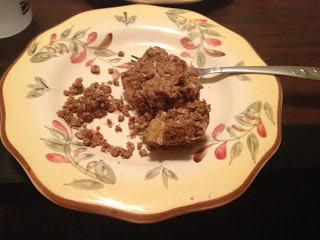
Once you have all the topping in, you just pop them into a 350 degree oven for about 30-35 minutes and then they're done!

See, the doubled topping makes them so much better

I absolutely loved this dessert and I am so glad that there are leftovers to snack on tomorrow. It's a yummy fall treat that takes care of some apples if you have them sitting around (like I do). And plus it made my apartment smell super yummy while they were baking!

Baked Apples with Oatmeal Brown Sugar Topping

6 small apples
1 cup plus 2 tablespoons melted butter
1/2 cup oatmeal
1/2 cup flour
1/2 cup brown sugar
1 teaspoon cinnamon
pinch ginger
pinch salt

Instructions

Preheat oven to 350.

Cut apples in half and take the core and stems out.

Mix together melted butter, oatmeal, flour, brown sugar, cinnamon, ginger, and salt.

Place apples into baking dish and press topping into apples.

Bake for 30-35 minutes.

Refrigerate leftovers. Makes 12


Sunday, September 1, 2013

The Print from the Past

This weeks project started with a trip to my favorite antique store. I can use the word "favorite" very confidently because, out of all the antique stores in my home town (and there are a lot of them), none can compare to what's inside this one. Why? Because this particular store has an entire floor dedicated to vintage clothing.

I could spend a whole day pilfering through the racks of dresses. The hat collection alone could entertain me for at least an hour.
Hats! I absolutely love old hats.

Because I've made plenty of trips to this little gem of a store, I know exactly where to look for clearance clothing. The clearance corner is one of my favorite sections of the room; it's just full of dresses that are begging to be re-fashioned. It wasn't long before I found this 1970's ankle-length print dress on the rack.

After inspecting the dress and its small imperfections (all used dresses have them, after all) I decided it was well worth the $5 price tag. When I got to the register, I was told that everything upstairs was marked down. I got to take this dress home for about $4.45.
I immediately fell in love with this print; it's so dramatic and artsy!

When I got home, it was time to lovingly take the dress apart. I think that taking dresses apart is my favorite part of re-fashioning; people usually go through great pains to keep their dresses neat and unharmed... It's a nice change to attack the seams with scissors and seam-rippers.

First thing's first: the dress was much too long. I love long dresses, don't get me wrong, but with the big bold print, I felt that less was more. I looked up some tutorials on the best way to shorten a dress evenly, and decided that none of them were for me. I measured the front with a piece of ribbon that I'd cut to the length I wanted, and then proceeded to cut the dress without a pattern or a method.

I wanted the back of the dress to be a bit longer than the front.
Next I pinned the bottom to make the new hemline. It's been a while since I sewed a dress, but I did remember that, after pinning, it's important to press the hem. Unfortunately, since I've moved in the last year, I've lost track of a lot of things... Including the iron. I like to think of myself as pretty resourceful, though; my hair straightener made a fine substitute.


 After sewing the hem, it was time to make a serious decision... What to do with the sleeves? As fun as they were, they didn't quite fit the style I was going for. So, off they went!

Pinning the black ribbon around the arm hole.
Taking the sleeves off was pretty time-consuming, but I was determined to keep the arm holes neat and intact. Unfortunately there wasn't much fabric to fold inside the arm holes once the sleeves were gone. After stitching around them the best that I could, I decided to hide the inner raw edges by hand-sewing some black ribbon.


Finally, it was time to make a few small repairs. The zipper in the back of the dress worked great, but it was starting to come apart from the top of the dress:

After some pinning and persuasion, I managed to make the back a little neater. At long last, the dress was complete! I can't wait to show off this print!